CUSTOM DATA FIELDS
Custom fields are a great way to capture additional data about your contacts. These fields can be utilized in helpful ways, such as in targeted campaigns, dynamic content/message personalization, and triggers for automated messaging. Users with ADMIN permissions can update or create new custom fields.
NOTE: Contact custom fields are different from Lead custom fields. To modify Lead custom fields, please contact your Account Manager
ADDING CONTACT CUSTOM FIELDS
Bonfire comes with the following Contact default fields:
- Phone
To add or delete a custom field,
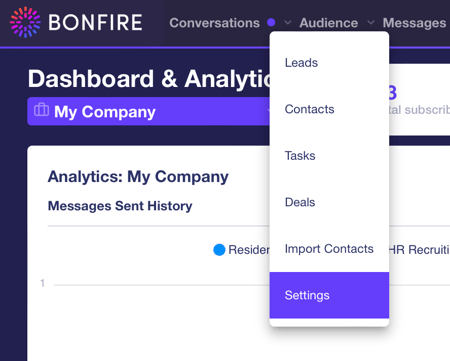
- Go to the Audience tab on the top of the screen and click on Settings
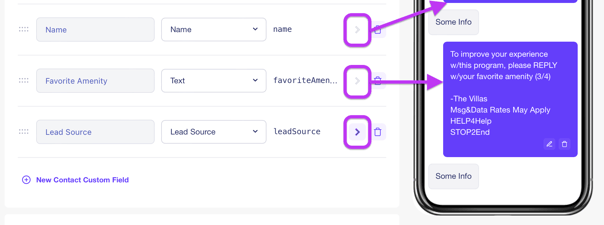
- In the first section, you will see your existing fields, including default and custom fields. In the image below, we have the two default fields and three custom fields - Name, Favorite Amenity, and Lead Source. Each Custom Field can have a 'Type' which is important when syncing data from PMS systems. Try and match the field you're creating with its associated 'Type'. If one does not exist, you can create a standard 'Text' type.
Let's create a new field by clicking on the 'New Contact Custom Field' button.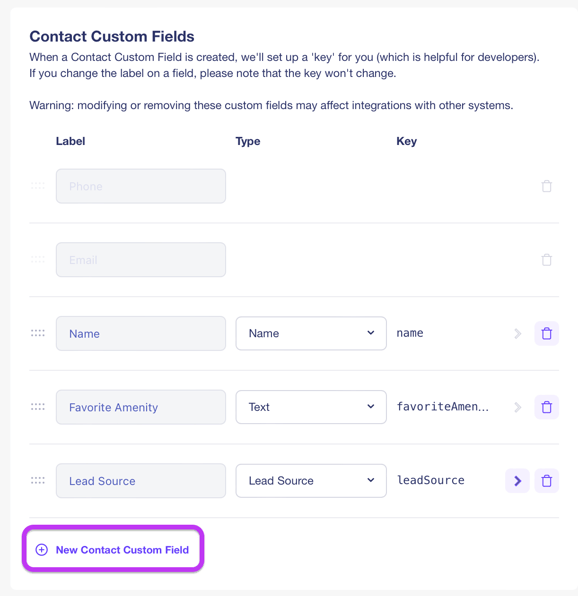
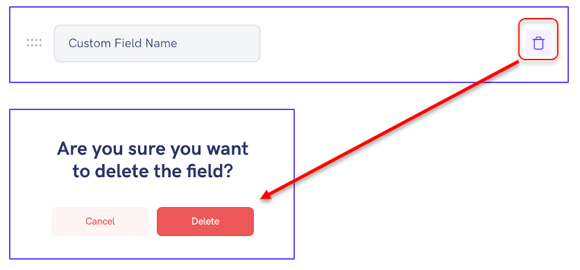
- Click in the text box and give your new field a name. Click the check mark to confirm. You can delete a field by clicking on the trash can icon.
- The small arrow button next to each custom field optionally adds the field to the subscriber texting flow, that is to say, what subscribers will see when they text in the keyword to opt-in to the program. Custom fields that have been added to the flow will have not be able to be selected, as they are already in the simulator on the right hand side. We see this in the image below, where name and favorite amenity have been added. Lead Source, however, is not something we want in our texting flow, so it has not been added. More on this later.
OPT-IN KEYWORDS
Keywords are super important! When someone texts in an “Opt-In” keyword or “Sign Up” keyword, they will automatically receive a set of questions to collect data set in your default and custom fields. If you need help with your keywords, reach out to your Account Manager.
You'll see your current Opt-In keywords underneath the Contact Custom Fields.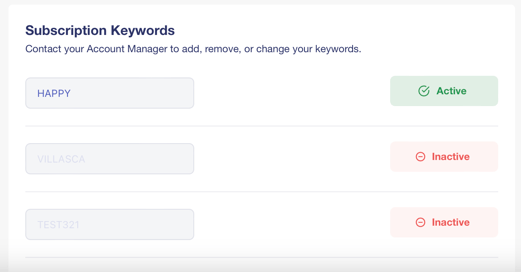
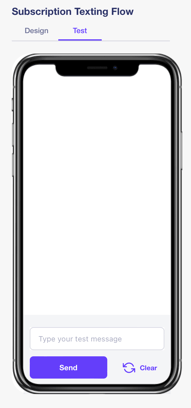
SUBSCRIPTION FLOW
The Subscription Flow simulator is where Contact Custom Fields and Keywords come together. This is what your subscribers will see when they text the keyword to opt-in.
You can re-arrange the order of the questions by hovering over the left side of the text bubble until the dots appear. Then click and hold, and drag the question up or down.
You can also edit and remove questions from the flow simulator using the buttons at the lower left corner of each text bubble.
NOTE: Removing a field using the trash icon will not delete the custom field. It will only remove the field from the flow.
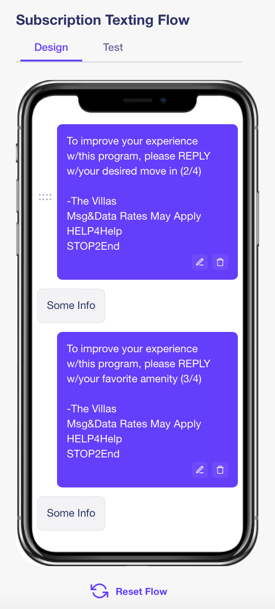
Pressing the Reset Flow button will reset your flow to the default state. Click on the Test tab enter your keywords directly in the simulator to experience the texting flow for yourself. Click Clear when you're done to reset the test.