WHAT IS A JOURNEY?
Journeys give you the power to create automated workflows for your subscribers. Use Journeys to send targeted, personalized messages, add or remove tags, update stages, and accomplish many other tasks.
In this article, you’ll learn how to create a Journey.
BEFORE YOU START
Journeys must be enabled by your Account Manager before it will be visible in the menu.
CREATE A NEW JOURNEY
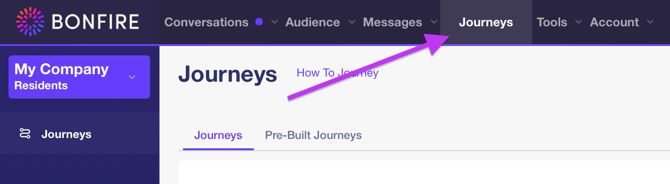
You create and manage Journeys on the Journeys page. This is found under the 'Journeys' heading in the top navigation bar. Here you’ll be able to create a new Journey from scratch or use one of the pre-built templates to get you started.
To create a new Journey, follow these steps.
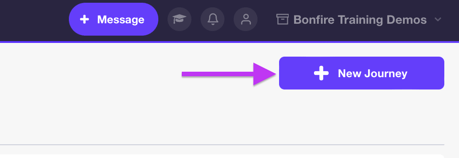
- Click the ‘New Journey’ button
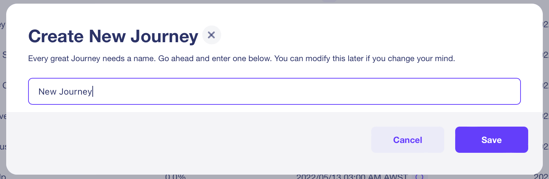
- Give your Journey a name (this can be changed later), and hit the save button
- You will see your new Journey in the Journey list. New Journeys are inactive by default. Note: Be careful when activating your Journey as it will immediately begin operating!
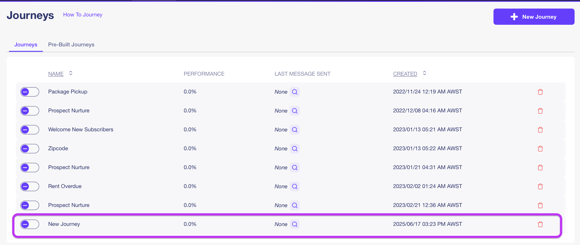
- Click on the name of the new Journey you created to enter the Journey Builder.
BUILDING A JOURNEY
The Journey Builder consists of several Tabs. We will go through each in turn, beginning with the first tab, the Steps tab.
The Steps Tab
- Data cards
At the top of the Steps tab, you will see four white rectangles. These cards contain useful data about the selected Journey. New Journeys, like the one we just created, will not display data until they have steps and participants.
- Steps: The number of steps in the Journey (excluding any Triggers)
- Participants: The number of total participants who have ever been added to the Journey.
- Active Participants: The number of participants currently at a step in the Journey.
- Performance: the number of participants who have met one or more goals (we will discuss goals later)
- Triggers
Beneath the Journey cards, you will see the option to create a Trigger. A Trigger is an automatic way of adding Participants to your Journey based on the occurrence of a particular event. Clicking on the Trigger button opens a pop-up with the following Trigger Types: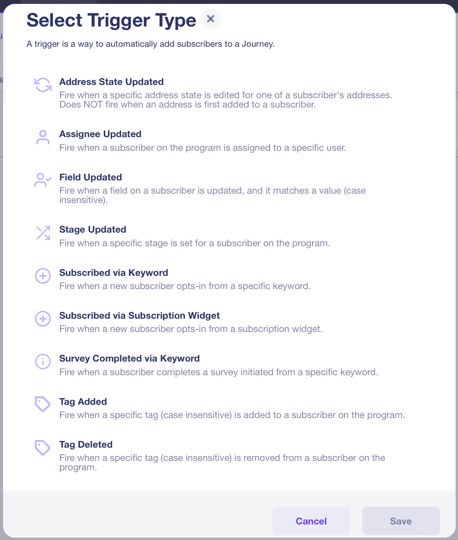
This is a list of the types of Triggers that are available to you. Keep in mind that you don’t have to use a Trigger in your Journey. You could manage your subscribers manually from the Participants tab (discussed later). But Triggers offer a powerful way to automatically add Participants to a Journey. Each of the Trigger Types are described below:
- Address State Updated: Fires when an address (email or phone number) is changed.
- Assignee Updated: This Trigger will fire when a subscriber in IRIO is assigned to a specific internal user.
- Field Updated: This Trigger will fire when a subscriber in IRIO is updated to a particular value. This could be Phone, Email, or any other field or custom field used in IRIO.
- Stage Updated: This Trigger fires when a subscriber’s stage is updated. The subscriber could have a different stage or no stage prior to the Trigger firing. The Trigger will fire when the new stage is set.
- Subscribed via Keyword: This Trigger fires when a new subscriber opts-in using a specific keyword.
- Subscribed via Subscription Widget: This Trigger fires when a new subscriber opts-in from a Subscription Widget.
- Survey Completed via Keyword: This Trigger fires when a subscriber completes a survey initiated from a specific keyword.
- Tag Added: This Trigger fires when a specific tag is added to a subscriber.
- Tag Deleted: This Trigger fires when a specific tag is removed from a subscriber.
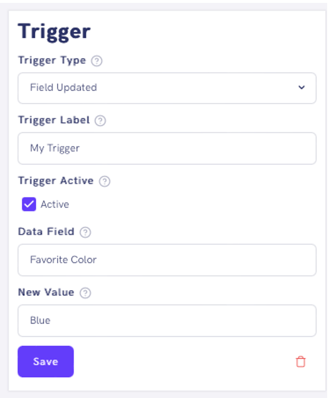
Once you select a Trigger, you will see a settings box appear to the right side of the Builder. Depending on the Trigger Type, different options will appear in this settings box. In the example below, a ‘Field Updated’ Trigger has been chosen. The user can also change the Trigger Type, give the Trigger a name, and change its active status. In addition, the user can set the Data Field that they want the Trigger to monitor and provide a new value that will fire the Trigger.
Click Save to save your settings. You can also hit the red trash can icon to delete the Trigger.
Once you’ve created a Trigger, you can create more by clicking on the ‘+’ button next to the existing Trigger. This allows for subscribers to enter the same Journey via a variety of different methods.
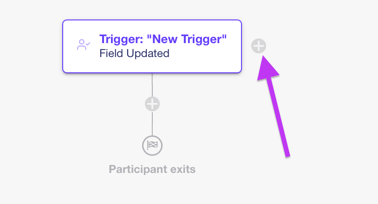
Below the Trigger box you will see another small ‘+’ button. Click this to view the Step Types pop-up. There are two categories of Steps you can use in your Journey—Actions and Conditions. We will go through each in turn.
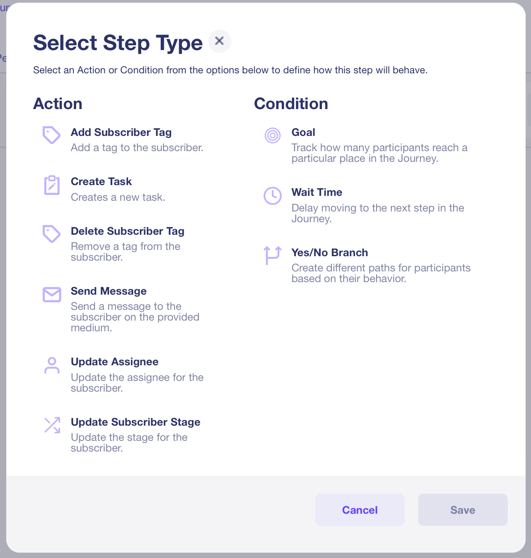
Action steps are powerful tools to communicate with and categorize Journey participants. The following Actions are available:
- Add Subscriber Tag – Add a Tag to Participants who reach this step
- Delete Subscriber Tag – Delete a Subscriber Tag from Participants who reach this step.
- Send Message – Send a Message to Participants who reach this step.
You can use Journeys to send SMS/MMS, Simple Email, or Advanced Email messages. Simply select which one you want and click the Create Message button. Alternatively to creating a new message, you can load a Template or a Previous Campaign to save time.
You can also set your notification settings in the settings box.
- Update Assignee – Update which internal user is assigned to the Participant
- Update Subscriber Stage – Update the stage for the Participant from a preset list.
Conditions
Conditions are a critical piece to creating effective Journeys. Conditions are typically placed between Action steps. You can have multiple conditions between Action steps.
NOTE: It is often desirable to add a ‘Wait Time’ step immediately after the Trigger and between any Send Message steps. But the power is in your hands!
Bonfire offers the following Conditions:
- Goal: A goal is an internal metric that measures how many have reached a particular point in the Journey. This is used to measure Journey performance. There are no settings to set for a goal, but you can give the goal a name.
- Wait Time: A Wait Time condition allows you to delay the Journey from continuing for a desired amount of time. You can set the Wait Step to a future day/time or simply set a duration in days, hours, or minutes. Participants who reach a Wait Step will wait for the set time.
NOTE: On the Settings tab, a Timing page gives you the option to restrict the execution of actions to within a certain time frame. This is to ensure that Participants don’t receive messages at inconvenient times (such as the middle of the night.) For example, if a Participant reaches the end of a Wait Step at midnight and the next step is a Send Message step, and the Timing settings are set to only execute Actions during business hours, the Participant will be sent the message at 8am.
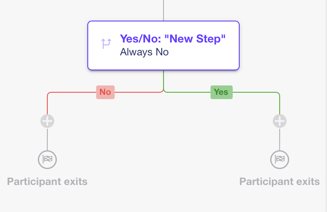
- Yes/No Branch: Yes/No branches split the Journey into two separate paths based on a number of possibilities occurring. We will go through each one below.
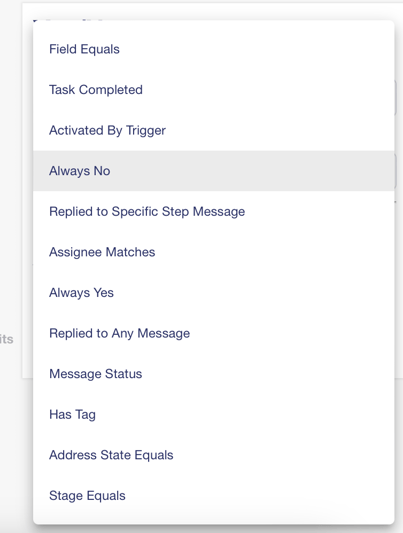
- Field Equals: If a Participant reaches the Yes/No Condition Step with a Data Field matching a specified value, they will proceed down the Yes branch. Otherwise, they will proceed down the No branch.
- Task Completed
- Activated by Trigger: Sometimes, it might be useful to distinguish between Participants who entered the Journey via a particular Trigger from those who entered via a different Trigger or were added to the Journey manually on the Participants tab. Those who entered the Journey via the Trigger set here will go down the Yes branch.
- Always No: If you have a Yes/No step in your Journey and you don’t want to necessarily remove it, you can instead opt to have Participants automatically sent down the No branch.
- Replied to Specific Step Message: This Yes/No type will take note of which specific step a user replied to. This is useful if a Journey has multiple message steps, and you wish to change the user's Journey on just one of those messages in particular.
- Assignee Matches: If the internal user assigned to the Participant matches the user set in the Trigger settings, the Participant will move down the Yes branch.
- Always Yes: Similar to the Always No condition, only this time Participants will be sent down the Yes branch automatically.
- Replied to Any Message: If a Participant replies to a Message, they will be sent down the Yes branch. In the settings box, you will need to select which Send Message Step you want this condition to monitor.
- Message Status: This Condition checks if an email message has been opened, had a link in the email clicked, or if an email has bounced.
NOTE: Click tracking for links sent via SMS is coming soon!
- Has Tag: If a Participant reaches the Yes/No condition with a specific Tag, they will be sent down the Yes branch.
- Address State Equals: Deviate a subscriber based on their address state. These can be 'Opted In', 'Emergencies Only', 'Pending Opt-in', or 'Opted Out.'
- Stage Equals: If a Participant reached the Yes/No condition with a specific Stage, they will be sent down the Yes branch.
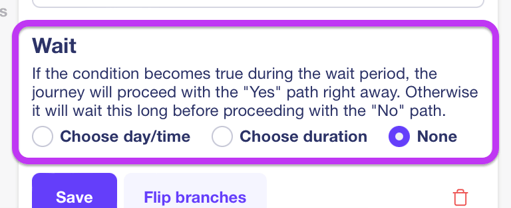
A Yes/No branch also comes with its own 'Wait Time' functionality, allowing you to build in time to monitor for a 'Yes' condition before a 'No' is recorded.
You can also flip the branches of a Yes/No condition, so that everything beneath the Yes branch will be moved under the No branch, and vice versa.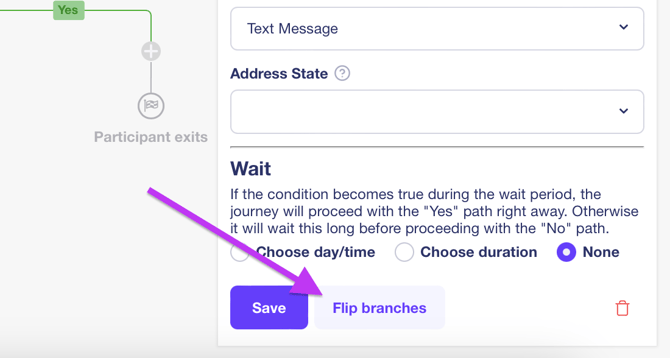
That completes our survey of the Steps tab. Let’s move on to the Participants tab!
THE PARTICIPANTS TABThe Participants Tab is divided into two sections. The left-hand side is where we add participants, and to the right we see all the current and finished participants in the Journey.
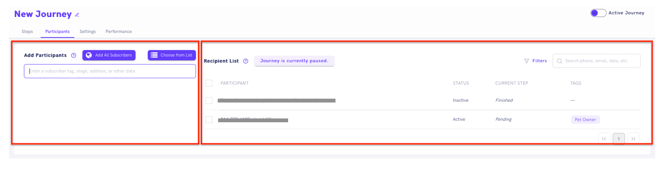
To add Participants, simply begin typing their name, email, phone, or other custom field data. Alternatively, you can choose from a list or add all subscribers.
In the image below, you can see that we have four Participants in the Journey. Their current step is ‘Pending’ because they were added to the Journey while the Journey was inactive.
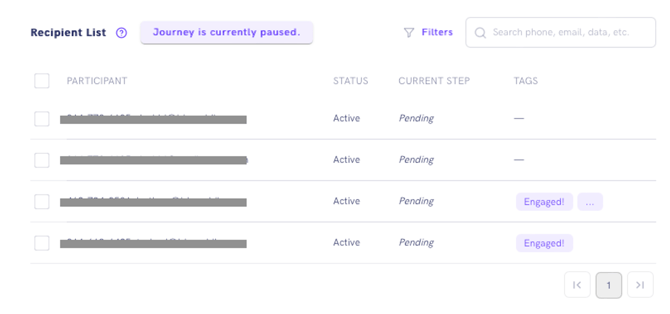
Select a Participant and you’ll see several options appear.
Pause: this pauses the participants progress in the Journey. Activating a Journey will not activate paused participants. They will need to be manually resumed using the ‘resume’ button.
![]()
Select ‘Mark as Finished/Remove’ will cause the following popup to appear:
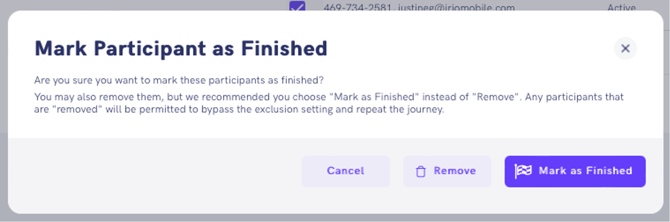
This popup gives you the option to either remove a participant or mark them as finished. In the Exclusion section of the settings page, which we will discuss next, there is an option to allow Participants to repeat a Journey. This is off by default. By removing a participant, they are permitted to repeat the Journey even if the Repeat Participants exclusion setting is off.
NOTE: We recommend choosing ‘Mark as Finished’ to prevent users from repeating the Journey.
SETTINGS TAB- Timing
The Timing section of the Settings tab contains options to change the time zone and select which days and time of day actions should be executed. As stated previously, these settings override any Wait Time settings.
NOTE: By default, Journeys only execute actions on business days between 8am and 5pm. It is our recommendation not to change these settings, as changing them may send messages to Participants at undesirable times. - Exclusion
The Exclusion section on the Settings tab contains a number of important options.- Repeat Participants: This checkbox allows subscribers (also called contacts) to repeat Journeys.
- The next section allows you to remove a Participant from all other Journeys when enrolled in this Journey. You can also set them to not be removed or removed from a specific Journey.
- The last section on the Exclusion page is the Exclude List. You can exclude individuals or groups from entering the Journey using this functionality. The search box is very similar to the one found on the Participants tab.
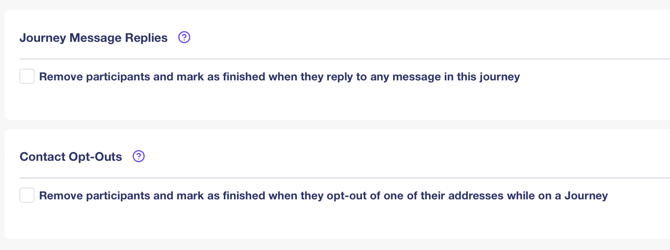
- Actions
The final section on the Settings tab is the Actions section. There are only two options here. The first allows you to remove a participant from a Journey as soon as they reply to any message in the Journey. This includes replies to SMS/MMS messages, Simple Emails, and Advanced Emails. The other option removes them if they opt-out.
-
Performance
- Individual Journey Performance
Next, we’ll discuss the Performance tab. This offers insight into the overall performance of the Journey, as well as the performance of individual steps.
Click on the Journey Name to view Audience, Opened, Clicked, and Bounced rates. The default date range is the previous 30 days, but you can modify this using the date range picker to the right-hand side of the screen.
We provide two charts to visually display your Journey performance. The first displays the Audience (number of Participants who received a message), as well as the number of opens, clicks, and bounced messages. The donut to the right displays engagement. Any reply, open, or click is considered an ‘engagement’ and will show here as a percentage of all Participants.
Click on the individual steps on the left-hand side to see metrics only for the selected step.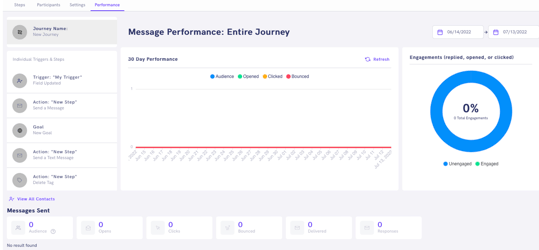
- Overall Journey Performance
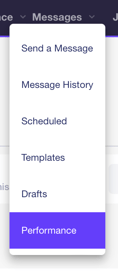
There is another place in Bonfire to view overall Journey performance. Under the Messages menu, click on Performance.
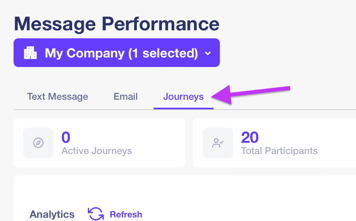
Now click on the Journeys tab to see performance metrics for all Journeys on the Program. You can see the number of Participants, those currently active, and a ‘met goal’ percentage. Clicking on an individual Journey will take you to the performance page of that Journey.
- Individual Journey Performance
THE MESSAGE HISTORY PAGE
You can view Journey messages separately from other sent messages in Bonfire. Select ‘Message History’ from the Messages menu.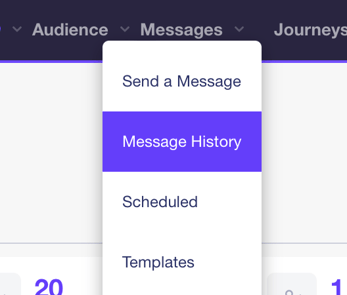
Now select the ‘Journeys Messages’ tab.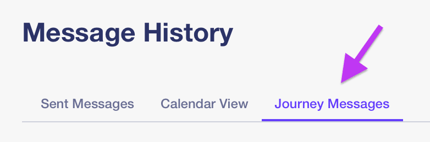
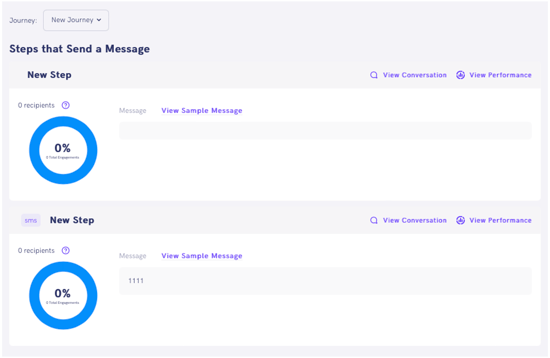
On this page, you can select a Journey and view all the ‘Send Message’ steps in one easy to view place. You can see the message that was sent, total engagements, and link to the conversation page (which will show any replies) or go to the Performance page.
THE CONTACTS PAGE
You can also view Journey messages from the Contacts page. Click on ‘Contacts’ in the Audience top navigation menu.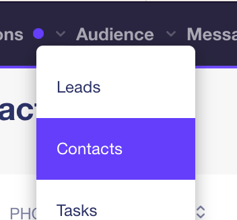
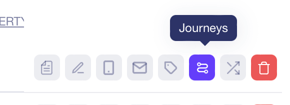
You will see a Journey’s shortcut button for each Contact. Click this button for one Contact.
On the pop-up that appears, you will be able to quickly and easily add the Contact to any Journey that exists on the Program.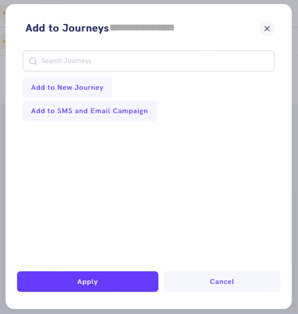
Multiple Contacts can be added to a Journey at once using this method. Simply select multiple Contacts and you will see a quick action shortcut appear at the top of the Contact list. See image:

Clicking this button will cause the same pop-up described above to appear again, allowing you to quickly add these Contacts to a Journey.
THE INDIVIDUAL CONTACT PAGE
You can also view Journey messages from the Individual Contact page. Click on ‘Contacts’ in the Audience top navigation menu, then select a Contact. You will see all the Journeys that this Contact has been on and their current status in those Journeys. From here, you can also pause, resume, or remove/mark the Contact as finished – the same options we saw earlier on the Participants tab. Clicking on the Journey name will take you to the Steps tab for that Journey.
JOURNEY TEMPLATES
We offer a number of pre-built Journey templates that can be found on the Messenger -> Journeys page. Click the Pre-Built Journeys tab to see the templates.

Click on one of the templates to see the flow of the Journey. You cannot make any changes to the template, but if you wish to use it as the basis for a new Journey, simply click the ‘Duplicate’ button found at the top right corner of the page.
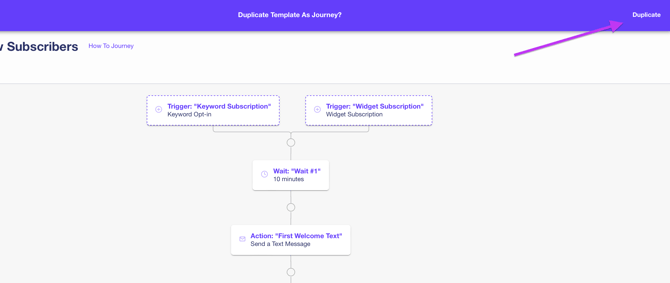
NOTE: The settings for each step and the options in the settings tab on the Journey view page cannot be modified until a duplicate is created of the template.
When you click the ‘Duplicate’ button, you will see a message popup letting reminding you to change any placeholder text that might be in the template. Don’t assume the Journey is ready to send as soon as you duplicate it! Take the time to look at each step, preview message content, and test it thoroughly.
Journeys made from Templates will be inactive when they are created. Activate the Journey when you are sure it is ready to be used. When you create a Journey from a template, it will appear in the Journeys list along with any other Journeys.
IMPORT TO JOURNEY
At this time, it is not possible to import Contacts directly into a journey via integration or upload. But using Actions, it is easy to achieve the same functionality. One way of doing this would be to include a specific tag in your import and have a Journey Trigger fire when that tag is detected on a Contact.